Friday 27 September 2013

Pyrotechnic cable cutter modification for vacuum.

As you can see from the previous post, being able to cut away a high altitude balloon is really important, particularly in New Zealand.  The prevailing winds and narrow island means pretty every balloon flight desperately wants to go out to sea.  In fact we have lost a couple of flights this way.

There are several different methods which get used to cut away balloons.  The most common in amateur circles is, I think, the hot wire cutter.  Basically the scheme is to use some nichrome wire to cut something which lets the balloon go.  This is usually a cable tie for simplicity.

We experimented with this approach in our very first balloon flight. There are two problems or challenges with this method.  The first is that it needs a lot of current which can be challenging to supply on a balloon. You also have to wonder, how long do you leave the current running?  You don't want to leave it running too long otherwise you need a separate battery pack to run it least your electronics brown out.  You can test it on the ground but conditions at balloon cut away are going to be very different, cold and a pretty good approximation of a vacuum.  How good a contact does the nichrome have with the cable tie?  How much does convection contribute to getting heat into the cable tie?  There will be almost no convection at altitude.

The second problem is reliability, nichrome is pretty brittle to begin with and fatigues really quickly.  The cold at altitude won't help this.  As the nichrome is in contact with an inherently flexible element and the balloon does bounce around a bit on the way up, it seems like it would be really unreliable.  So then, you double or triple it up but that adds to the requirements of delivering lots of current.

What we ended up going with on our previous flight was a cable cutter.  Nasa uses cable cutter to do things like cut away the bridle on the curiosity mars rover and deploy solar panels on satellites.  They have existed for a long time, here are a couple of patents for these sorts of things from the 60's and 70's.  US 3885484 AUS 3482484 A  and US 3550274 A.   While these would be easy enough to make, we decided to buy a couple from Archetype Rocketry as they are reasonably affordable there.


These cutters use black powder (BP) and Q2G2 igniters (they are super reliable and very low current, we love these things).   The only problem with this setup is that black powder is very unreliable at high altitude, it's the bane of high altitude high power rocketry folk.    Thankfully we have a vacuum chamber and some reasonable vacuum pumps.  The pumps are supposed to be good down to10^-4 torr but realistically we expect to be getting quite a bit less than that.  For reference 1 torr is about the equivalent pressure at 46km in the 1976 standard atmosphere.

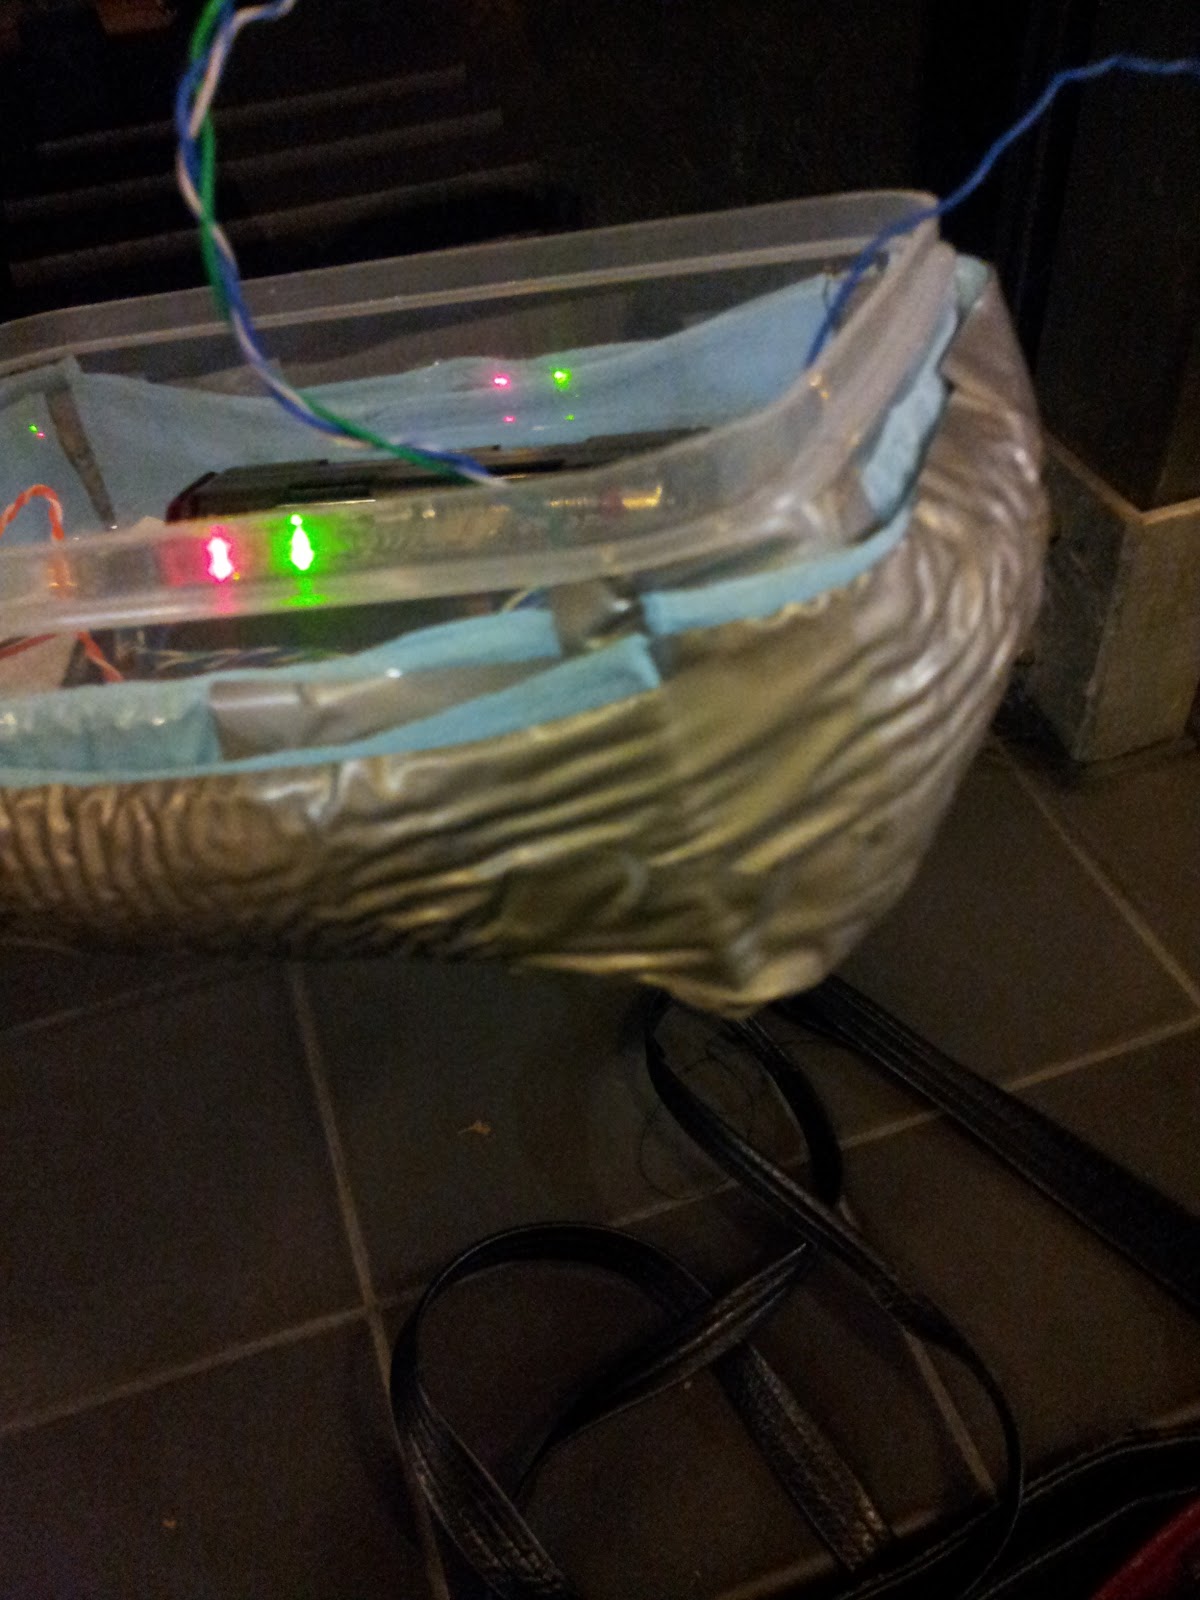
We first tested the igniters in the vacuum chamber by themselves.

The igniter bridge wire burnt but the BP making up the igniter head didn't go up.  The BP has its own oxidiser so that's not the problem.  What happens is that heat isn't transferred well across BP particles.  Sure some of the BP in direct contact with the bridge wire will go and produce some gas, but that will disperse very quickly into the surrounding vacuum, taking its heat away with it. 

There are two ways to fix this, one is to keep the igniter and BP in a pressurised space, doesn't have to be pressurised with air, could be any gas, but its still a pain.  The other option is to enclose the igniter and BP in a small space.  That space can be under vacuum initially but as the small amount of BP in direct contact with the bridge wire goes up, the small amount of gas streaming off can pressurise the small volume a little bit.  This can help some more of the BP to go and then the process can cascade.  Note that the seal around the BP doesn't have to be perfect, it just has to be good enough for the pressure to start rising. Transients are where its at.

Our first attempt was to just try the cable cutters as directed, but under vacuum.  The cable cutter contains the igniter and BP in a small space, perhaps a small enough, sufficiently well sealed enough space for the BP to go.  Sadly this was not the case.

What we came up with next was to make a little cartridge for the BP out of a drinking straw and some hot glue.  Kinda sketchy sounding I know, but it works pretty well.  It is also very convenient that the Archetype rocketry cable cutter internal diameter very nicely matches the diameter of a drinking straw.


We seal one end of the drinking straw with hot glue, this is the side that faces the internal cutter.   What you end up with is this
I may have got a bit carried away CADing this up.  Note to self, don't CAD late at night or you are liable to go on a CAD ramble.   The relative dimensions are only approximate I made this up from memory.  I'm currently in the US and don't have any cable cutters with me.  Or verniers for that matter.

Anyway, we also filled up the hex socket of the bolt with epoxy to help seal the chamber.  It also help keep the igniter wires really secure.  It means we have to replace the bolts every time but they are really easy to make up on the lathe out of a socket screw.  They are imperial sized which is a bit annoying but no big deal.

With these simple modifications the cable cutters work really well under vacuum.  I have a  video of one going off under vacuum,  I can't currently find it but I'll add it when I do. 

These cutters were tested on the last balloon flight, we had a pair of them cutting the same cable tie the balloon payload was suspended from.  They cut the balloon away as we crossed out of the flight zone polygon and saved the payload!  Good job cable cutters.  

This test wasn't perfect as the balloon only got to ~10km.  At this altitude there is a lot more air than at 20km or 30km and there is a good chance the cutters would have worked without any special vacuum mod.  However, it did test the systems and code around the cutters. It was also a test in rough flight conditions, there is a good chance that he balloon was bouncing around a fair bit.

I think we can be reasonably confident the cutter will work in following flights especially if we double them up as we did on this last flight.  Having a reliable flight termination system is really crucial in New Zealand to stop the payload falling in the ocean.  It's also really nice to be able to define an allowed flight area, making sure the balloon doesn't go somewhere we really don't want it to.

Thursday 22 August 2013

3am Balloon Launch 5th May (Floatnik 3) Post Flight Analysis.


I've finally found some time to do some post flight analysis on the may 5th flight.
The balloon flight path (southward) and the cut down polygon.   The red dot marks the maximum altitude, this is where the balloon was cut away.

The parachute used for Floatnik 3 was an overly large spare rocket parachute which we had lying around.  It really added to the drift outside the polygon, which is why we set it so far back from the shore.  We also set the polygon well back from Christchurch Airport to make sure we stayed clear. We have had some difficulty on previous flights reaching our predicted assent rate.  This causes the flight to deviate from the predicted flight path quite a bit. We thought it best to give ourselves some safety margin, even though it was the middle of the night and ATC indicated that there was no scheduled air traffic. 

When we recovered the payload in a paddock near Ashburton, the flashing lights made it much easier to find!   Both of the cut downs fired and successfully cut away their cable ties.  This makes Floatnik 3 as the main reason for the flight was to test the cut downs.  Ideally we would have liked to test the cut downs from a much greater height, but we ran out of gas on the balloon fill so our assent rate was down.  The cut downs were set to trigger at 20km or on the polygon, whichever came first.  Given the balloon assent rate, it would have gone far out to sea before bursting so the cut downs did their job admirably.    

The radio downlink worked flawlessly again, we had good reception over the entire flight.  The recovery team got good signal almost as soon as the balloon had been launched, they were about 60km away.  I'm always really impressed at how well we manage to do with a $3, 10mW radio.

Pubudu did some analysis on the raw radio data and made up some nice graphs.
The graph above shows the balloon assent rate which is pretty variable.  Part of this variability might be due to mountain waves as we had southward flow over the Southern Alps.   This is problematic for our balloon prediction code (we basically use CUSF's balloon prediction code running on our own server)  as the weather data it pulls definitely won't cover mountain waves.  

Our overall assent rate is also lower than we intended.  As mentioned above, on this flight we ran out of gas while filling the balloon.  We need to work on our gas metering, I'll cover our efforts on that from in a later blog post.   We had been hoping to get two flights out of each tank, that doesn't look like its going to be workable, so we might have to have another look for a cheaper gas supplier.
The payload decent graph shows some possible mountain wave oscillations as well. 
Lastly the total flight profile.


Monday 6 May 2013

3am Balloon Launch 5th May

Team9.99 launched another high altitude balloon for a test of the cutdowns to the payload.
We launched at about 3am from Lake Coleridge, the recovery team was posted in Ashburton and monitored the launch with directional antennas and GPS.

The test was successful, with the payload successfully tracked by our radio system and recovered in Ashburton. The cutdown system fired when the balloon left the pre-set flight polygon determined before launch.


Preparing the payload to be sealed, payload boxes are made from the same foam as one would find in a surf board. The material is very light and strong, with the bonus of being easy to carve for the boards in the payload. The payload was broken up into 3 packages, one for the SPOT GPS, one for the flight CPU board and radio, one for the cameras (we had light illuminating the balloon from below for the flight).


Payload boxes parcel tied and secured with safety patterned duct taped. Each box has about a meter of cord. The Parachute is at the top of the packages.

 Maneuvering the hydrogen tank onto the scales for balloon filling.

The recovered payload, parachute is visible here and at the base one of the LED tube lights can be seen. The payload had one green, one red, and one white LED stick to light up the payload and make it more visible on recovery. 

Video of balloon release to come soon!

Thursday 10 January 2013

Vacuum testing igniters 10-01-13

Yesterday evening some of the team got together to test igniters in a vacuum.

The broader context is developing a cut-down mechanism for high altitude balloons based off some existing methods.

In the picture below you can see that the portion of igniter charger in the immediate vicinity of the hot wire reacted, but that's only a small portion of the whole charge.
From the test it seems that the black powder needs gas around it to help transfer heat to adjacent grains.

Sunday 6 January 2013

Balloon Launch, Sunday 6th Jan 2013


On Sunday morning, January 6th, 2013, the team released a high altitude balloon.

This was a test for the radio and GPS systems to accompany another of our projects we have been working on for around a year (the rockoon- details to come soon).


Here are a bunch of pictures from the event, and a video of the balloon release.


The Payload box, planning the internal layout

The controls board, including a Battle Blimps board, and a SPOT GPS tracker


Removing the skirt from the weather balloon. Latex gloves at all times when handling the balloon!


Balloon with skirt removed.


Parachute and payload box. This was for a drop test to check the parachute size.

Recovery team set up. Yagi antenna and FunCube dongle. FLDigi decoding, and HDSDR.

The Recovery team, hanging out in Chertsey.


The launch site, next to Lake Emma.


Hydrogen tank

Setting up the balloon prep area.